"Lo, Children Are An Heritage of the LORD: and the Fruit of the Womb is His Reward" - Psalm 127:3

Saturday, July 30, 2011

Go Fly A Kite ;)

Have you ever witnessed the pure joy of a kid with his first kite?

My 7 year old had his first kite-flying experience this weekend, with the help of his Dad.

Obviously, he had a great time :)

His shirt says, "I'd rather be playing video games." But we don't play video games. We don't own any, and the shirt was given to us as a hand-me-down. I think it's ironic. It's hard to enjoy the simple pleasures of being seven when your mind has been numbed by video games.

I'm glad he was able to enjoy himself ;)


Fun at the Fair

Friday I had a momentary lapse of sanity :) and decided to take all the kids to the fair - daycare kids included. It really was a fun day, but was completely exhausted after the fact. I did this with the help of my 20 year old son (my 18 year old daughter has been cooking at camp all week.)

There are always a lot of really fun things to do at the fair. This year they had a group of high schoolers who had designed robots, and they had them on display where people could try driving them. My 7 year old thought that was pretty fun.

This is the robot he was controlling. You can see the "arm" moving here if you look close. There was an obstacle course set up to drive the robots over. It was pretty fun.

Saturday we went back when Dad could go along, and he tried his hand at the robots too.

The littler kids enjoyed seeing the 4-H animals. Our 2 year old was especially excited about the chickens and the bunnies.

There was a group that had classes on animals - one animal at a time. The first class was on bunnies. All the kids got to hold bunnies and pet them. You can guess how big of a hit that was.

The next class was on beef. The kids got to bottle feed a calf. The 7 year old thought that was pretty cool.

The two year old wasn't sure he wanted to hold the bottle. Instead, he gave the calf a hug, then petted his nose ;)

We missed the class on draft horses, but made it to the last one - on chickens. They got to pet the chickens, but couldn't hold them because they would fly off. The neat thing about these classes was that they had 4-H kids explain all the details about the animals, and the animals that were brought to the classes were supplied by the same kids. So they were showing their own animals, and explaining all about raising them.

They also had a booth with lots of animal things on it - rabbit skins, a freeze dried horse hoof, hinged open so you could see the tendons and such, horseshoes of all different sizes, and examples of animal feed, with a magnifying glass for the kids to look up close at it. If you look on the table in the picture, you can see a Clydesdale horseshoe, along with a pony horseshoe. In the picture the 2 year old is pointing to, there is a picture of the largest and smallest horse breeds standing next to each other, face to face. They even had a gallon jar of rabbit poo and you had to guess the number of pieces.

There was a very large petting zoo - free to get into, but the feed was sold by the cup. The 20 year old bought some, and he and the 7 year old fed the animals by hand. Thankfully there was a hand-washing station set up nearby.


The two year old really liked this particular cow. They had brushes hanging nearby and the kids could brush the cows. I've gotta say, this was the biggest cow I've ever seen. And that's saying a lot since I grew up on a dairy farm in Nebraska, and we also raised beef cows. Then we moved to Wyoming where there are nice, big beef cows. This cow was an Ayershire, which the sign said are native to Scotland.

This cow (or whatever it was) is called a Watusi - known for their big horns. The picture doesn't do it justice. The horns were easily 5-6 feet EACH. The 7 year old once wrote a book he titled "Big Horns" which was about bull riding, so I wanted to get his picture with this real big horns. He didn't want to get anywhere near it :)

The two year old preferred the ducks. He sat himself down here and didn't want to move.

One neat feature at the fair was a man who was building a sand castle. This is what it looked like on Friday.

And here is the amazing progress he made by Saturday. We were all impressed.

Here is the other side.

The 7 year old wanted to ride the roller coaster. It was just a small kids' version. He wanted Dad to ride with him. Can you see his expression? Too funny.

He told me he was trying to "smile for the pictures" in this one. It was a rather forced smile - lol.

We all had a lot of fun just wandering around enjoying everything - including cinnamon kettle corn, elephant ears, barbecue brisket sandwiches, etc, etc. I bought several raffle tickets (mostly for quilts). Hope that pays off ;)

The weather was beautiful - mid 70's with a cool breeze when a rain storm was blowing in. It was a nice weekend :)

Thursday, July 28, 2011

Farmer's Wife Blocks Ready to Sew

Success!! My goal was to get one block cut for the Farmer's Wife Quilt before I went to bed tonight, baby willing :) Instead, I managed to get FOUR cut!! Woohoo!

Okay, I know. Not all that exciting for you perhaps, but I've been thinking about this quilt for over a month. And after waiting for the book, then waiting until I could get fabric, then waiting until I could figure out how to make it (with much studying on the internet), and then waiting for the baby to be happy doing other things than eating and having me hold him, this is a long-anticipated success. :)

So, while the baby played happily on his own, or slept off and on, I got out all my goodies and got to work. (Okay, to be totally honest, this picture was taken yesterday. He played and napped in the swing today, but I figured you were probably getting tired of seeing pictures of him doing the same thing.)

I decided to use a mixture of techniques. I've never tried using templates to cut out a quilt block, and #3 looked like a good place to try them. I had cut out blocks 1 and 2 already with a rotary cutter, and was a little shocked by how much extra fabric it appears I will be wasting on block #1, which has triangles. I can definitely say using templates saves tons of fabric (um, except when you aren't paying attention, and cut the fabric that is under the fabric you intend to cut, destroying a small section of it. But we won't talk about that...) But my goodness. It takes FOREVER to cut out the templates, trace them onto the fabric, then cut out the pieces, being obsessively careful to cut just inside the pencil line. Ugh. I am quite sure I wouldn't be able to do the entire quilt that way.

Anyway, here are my first four blocks (from top, right to left) - #1 - Attic Window, (which looks nothing like the pieces I have here because there will be triangles sewn out of the squares), #2 - Autumn Tints, #3 - Basket, and #4 - Basket Weave, or, the Nazi block, as I like to call it. I was really paranoid about the fourth block turning out looking like a swastika, so I picked the most calming colors I could think of, and kept it all in the same color family. #5 - Bat Wing will be paper pieced, another new-to-me technique, and I'm thinking I'll use the dark blue from block #4 with the neon green from block #1 for that one. Nothing to show of it yet though because I'm really clueless on how to cut the fabric for that one, and will probably just sew and cut as I go.

As you can probably tell, I decided to do the blocks in the order they appear in the book (alphabetical), regardless of how difficult the block looks. I'm doing this project in order to learn new things, and that's not going to happen if I just pick the easy blocks. I don't want to get to the end and have only hard ones left. I'm afraid I'll run out of steam. Besides, I think it would be very difficult for me to keep track of which ones I had completed, and which ones were which (there are several very similar blocks) if I skipped around. This way, I can just stack them in order ;)

So in the process of starting this quilt, I learned a few important things.
1. I need a smaller ruler and cutting mat. The ones I have are monsters. The ruler is 24 inches long, and I am having a hard time maneuvering it in a way that I'm not running into it all the time.
2. I need to have an entirely clean work area before I start. In my excitement to get something cut before the baby started fussing, I didn't clear the entire table, which my seven year old was using for paper crafts and insect identification and analysis (it's a homeschool thing :) Anyway, that, coupled with the too-large ruler and cutting mat added up to headaches I could have done without.
3. I need a small container for scraps that might be big enough to use later.
4. This is fun. I think I can do it!

Farmer's Wife Progress, & Grandma's Visit

For those of you hoping to see some sewing progress, here's the tiniest little bit. I am pleased to report that I have learned a new skill. The Farmer's Wife quilt book comes with templates, but no rotary cutting instructions. I came across a very handy tutorial for drafting pattern blocks over at Bee in My Bonnet. (She has numerous very helpful tutorials for putting them together too :) Anyway, I had never been shown how to infer the size needed for each section of a quilt block just by looking at the shapes of the sections, and knowing the finished size of the block, so this was very informative to me.

I found this back when she posted it on the 14th of July, and bought a small graph paper notebook on a great back-to-school sale at my first opportunity. Then I spent several evenings sketching and calculating measurements for most of the Farmer's Wife blocks while I nursed the baby. It was very relaxing to me to sketch out the blocks and figure the measurements. I know there are resources out there where people had already calculated this, but doing it myself made it all make sense and now I feel I can easily go cut these out confidently and know how to put them together to get the block I want. I also feel confident that I could design my own quilt blocks and actually know how to create them!

I'm a self-taught quilter, so this is all new to me. I'm enjoying this particular project because there are so many skills I never knew how to do, that I am now learning. I decided not to draft patterns for any of the blocks that have a bunch of 1 inch half triangles. I plan to paper piece those, along with the ones with odd angles. That will be a new skill for me too. I'm hoping to actually get a chance to cut out fabric for at least one block sometime today. It's my "before I go to bed" goal. :) But we'll have to see whether the baby cooperates. And it's okay with me if he doesn't. He's already growing up so fast, and I don't want to miss a minute of it :)

Now back to family news and baby pictures ... :)


I know I say this every week, but it's been a busy week :) On Saturday, I found this gem at a yard sale. It's actually a futon bed, but it looks like a real couch to me! It is where the 20 year old is sleeping while he is here, and he says it's fairly comfortable. It's a real pain to make into a bed and back into a couch though because it's been broken at some point, and you really have to struggle with it, so most nights he just sleeps on it as a couch. Not a bad deal though for the $30 I paid for it! I got a lot of yard sale bargains this week, but I won't bore you with the details.

Isn't he angelic? As you can see the bassinet is already too small for my little bruiser. He didn't like it, and would never sleep more than 10 minutes at a time in it. We knew we were going to have to put up the big crib, but had to re-arrange the bedroom first.

As you can probably tell, we're a little limited on space. This is my husband's side of the bed, and yes, that is two large dressers stacked on top of each other. The bottom one is my husband's and the top holds the baby's clothes and the 2 year old's clothes.

My husband (with much too much help from the 2 year old) spent Sunday afternoon putting together the crib, after I had moved two bookshelves. We bought that crib at a yard sale for something like $25 - and we weren't even expecting at the time. I figured at the time that we would be moving to the other house, and using our current place as a full time daycare, and thought it would be nice to use real cribs instead of pack and plays for the kids. Instead, it doesn't appear that we will get the other house, but we have a need for the crib anyway. That's God providing ahead of time for our needs - before we even had a need!

Here's my side of the bed - with very limited space between the crib and our bed - maybe about a foot. The bookshelf behind it was turned the other way when we started, and the antique secretary was next to it, so that all had to be moved.

That left just enough room for my end table with a built in lamp, and my recliner, which is where I do most of my nursing (and a good portion of my sleeping :)

This picture is taken from the head of my side of the bed, looking toward the door. On the right side of the secretary is an opening to our master bathroom. As you can see, it's all quite crammed full.

I also haven't blogged this week because my mom has been here for a visit. She lives about 6 hours away, and we don't get together nearly as often as I would like. It was a great surprise to find that she had the time off work to come up for a visit. She had to leave yesterday, so now we're back to the normal, every day routine.

But it sure was fun to have her visit, and I can't wait to see her again in a month or so when we go to visit my sister's new baby (who should arrive in just a couple more weeks!)

I had to include this picture. He fell asleep on my lap, but I just love how they curl up back into the position they were in in the womb. Too sweet!

This is why I feel like he is growing up too fast. Already he is so alert, paying attention when we talk to him, cooing in response, and growing like crazy. Love this little guy! I just wish the time wouldn't pass so quickly...

Friday, July 22, 2011

Real, Live Sewing!

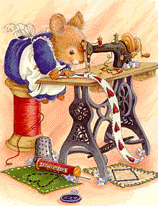
Look at this - Finally a post in which real, live sewing was done (albeit not much).

My daughter headed up to the Bible Camp she volunteers at on Wednesday night, so I was back to running the daycare on my own. I've had a really nice break, thanks to her. I haven't worked the daycare since June 21, when I was put on bed rest. That makes a full month off. And boy, did I enjoy it :D

Yesterday I was determined to see how much I could get done, and I was concerned that I wouldn't be able to get everything done. So every time the baby napped, I put him down and worked like crazy to get stuff done. I even put him in the swing or bouncer or on a blanket to play when he was awake so I could get more done. I did 5 loads of laundry, tons of cleaning and organizing, paid the bills, made several other phone calls (during nap time when it was fairly quiet) and got several other projects done. But today... all I wanted to do was snuggle my baby. Too much time away from him yesterday. That's okay. I don't think he minded making up for it today at all ;)

I made sure to take advantage of my last day free from daycare responsibilities by going to a free class at our local quilt shop. It was really more of an infomercial. They were demonstrating some rulers that allow you to create certain quilt blocks with nearly no waste (like the flying geese block, square in a square, Lemoyne star and others). Of course each block has its own ruler, so if you want them all you have to buy all the rulers. I just bought one. The ruler I got makes a Hunter's star.

I like the arrangement shown in blue - a "simple" two color quilt. It's very pretty like that, but I've always wanted to make the multicolored one you can buy a Thangles kit for (if you have ever looked at a quilting magazine, you've probably seen that quilt - bright colors, mostly purples). So now I've got another project on my list ... but not for any time in the near future :) In case you're worried about my finances, I used my contest winnings to pay for this - making it just a few cents for tax. (The also gave us a free pattern for coming to the class, which is shown in the picture with the two rulers above. It makes a table runner.) The sales pitch was very effective - or seeing the rulers in action was. They sell themselves. I'm seriously considering going back for the flying geese ruler so I can make all the millions of half square triangles for my Farmer's Wife quilt without all the waste. I am trying to decide whether using the ruler will help me save enough fabric to make it worth the price of the ruler... I'll let you know later what I decide, but I've gotta say, I'm the biggest fabric miser out there, so the ruler will probably join my stash of "necessary tools" tomorrow ;)

I used my daughter's $5 credit for participating in the contest to get this little ruler. It's okay. She told me the credit was mine. She doesn't get into sewing very much.

Here's a close-up in case you need one of your own. This ruler may not look like much, but it's going to save me a lot of time. It is 1/2 inch wide, meaning the line in the center is 1/4 inch - so if you want to make a half square triangle, you just line up that middle line with your square - corner to corner, and draw a line on either side of the ruler, and you have your stitching lines. Then you stitch both lines, then cut the square apart in the middle. It's a very quick way to measure, and it was cheap enough that the credit covered it with a few cents required for tax :) Gotta love that. For that matter, any time I need to measure a 1/4 inch seam allowance, this little baby is going to make life easier!

So you're probably wondering what I actually sewed. These nifty 10 inch square design boards are what I made (somehow I missed getting one of them in the picture - there are 6 in all.) These are made with a foam core poster board, which I cut into 6 segments. I got this idea from this tutorial on "mini design boards" over at the Bee in My Bonnet blog. It's an awesome tutorial. (She has some other great tutorials on how to sew certain quilt blocks that will really help me do my Farmer's Wife quilt. I also learned from her how to draft patterns and figure out measurements for cutting pieces with a rotary cutter rather than using templates, but I'll talk about that in another post.)

Anyway, the purpose of these boards is to allow you to cut out a quilt block and lay it out in order, next to your machine, so you can make sure you're sewing it correctly as you go. This will be perfect for my Farmer's Wife quilt. I can prep 6 blocks, then sew them when I'm ready. It also makes projects very portable as you can just stack up the prepared blocks - one per board - tie a ribbon around them and go. She uses batting for her middle area, but I used felt - I just happened to have some and thought it would shed less than batting might. She also uses very pretty fabrics for her borders, but I cheated by using store-bought bias tape which I got for next to nothing. Besides, she created the Sew Cherry fabric, so she has something like 27 BOLTS of fabric at her disposal, and I don't. I couldn't see using the expensive fabric on this project. Not to mention the fact that I didn't have time to make my own binding for anything other than a quilt.

This basket is my collection of bias tape and rick-rack. When we lived in the South, there was a place that sold seconds and assorted notions for super cheap. These packages are all marked 79 cents. I'm sure I paid even less for it - seems like it was a quarter a package. The rick-rack was all given to me by various grandmothers.

One other thing I tried that was different than the tutorial was to sew down the top of the bias binding. She says to use hot glue. But I couldn't find my extra hot glue and only had the one long stick that was with my glue gun, so I didn't think I would have enough glue without sewing.

Anyway, in the end, I have a nice, pretty stack of design boards (again, the one with the grey trim is not shown).

That's it for the actual sewing. How can you blame me, when this cutie wants to play with me all day? He's three weeks old now. I can't believe it. I don't know how the time went by so fast... Tomorrow he'll be 3 years old...

He spends a lot more time awake and alert now. (And he loves to chew on everything).

Like I mentioned, I just spent my whole day snuggling with him...

Such a serious look. It is really hard to get a good picture of his face because when I use the flash he tends to go cross-eyed. Poor little guy...

Okay, one more matter of sewing news to mention. I finally decided on my fabric for The Farmer's Wife quilt. I've been seeing this quilt all over blogland, and definitely wanted to make one, having grown up on a farm in Nebraska. The book contains essays for a contest from the 1920's where women answered the question, "Do you want your daughter to marry a farmer." I'm really enjoying the essays, and it brings back a lot of good memories about my own childhood, growing up on the farm. It's too bad that you can't make ends meet as a farmer anymore.

Anyway as you can see, I've chosen a rainbow of bright tone-on-tone fabrics. I'm thinking my sashing will be black, or maybe white. I'll decide that later. At least now I can get started. I was planning on doing the quilt in Wyoming colors (where I live now, and consider it home) - yellows, golds and browns. I wanted to use Kona solids, but there isn't a shop anywhere near here - like within a couple hundred miles - that carries Kona solids. I don't trust the colors on the computer well enough to order enough fabric for a whole quilt. It wasn't likely that I would get to any big cities before Labor Day, and I just have to get started on this quilt before then - ha. So I decided to change my color scheme. I think this will make a pretty amazing quilt.

Now that I have my mini design boards made I can at least start getting some blocks cut out. But then again, this little man demands a lot of attention - even when he's just being sweet and quiet. I make no promises to get much sewing done for awhile :)

(By the way, I'm pretty sure this is going to be my first thumb sucker. He is always trying, but his little thumb stays tucked inside his fist. I'm sure he'll get it figured out sooner or later. I wonder if he sucked his thumb in the womb...)