I've been working on and off for about two weeks trying to get my shelves installed. Not that the project was difficult or should have taken that long. I have a lot going on - ha - some would say that's an understatement. Anyway, here's the saga of the built in shelves...

Remember this odd shaped gap at the end of my hallway, next to my bedroom door?

I bought some 1x2's and 1x10's and cut the pieces into the lengths I needed. The wood in the picture above is for the bracing under the shelves.

Here is everything all cut and ready to install. From the bottom up, we have the 1x10 shelves, then long 1x2 brace pieces for against the back wall. These were cut the same length as the width of the shelves. On top of that, (and in the picture above this one) are the shorter brace pieces - two different lengths because of my oddball space I built the shelves into.

Here's the beginning of progress. The bottom shelf is in. I rested this shelf on the trim that was already there. I left a big enough gap that I could vacuum under the shelf with the hose attachment.

I started by installing the long support boards along the back wall. I wanted to make my shelves different (but very specific) heights - some 9 inch, some 12 inch, one closer to 13 inches and another around 11 inches. Once I measured the height from the shelf below to where I wanted the bottom of the next shelf, I lined up my brace, then leveled it and screwed it into place.

I had a little help along the way, which may explain why it took me *two weeks* to complete this very simple 2 hour project :)

There is not a lot of extra space in this little book nook, so when Mr. Helpful moved in, all progress came to a screeching halt.

I pre-drilled the boards and started the screws to make things a little easier and to keep the wood from splitting. If you look at the brace on the wall in front of the baby, you'll see that I originally started with a drill bit that was too small and the board ended up splitting. Once I switched to a larger bit, things went smoothly (apart from Mr. Helpful removing my screws!)

Here, a day or two later, I have my shelves all installed and partially painted. I actually painted one side of these boards before installing. I had my 17 year old daughter finish painting them while we were on our weekend getaway. She did a great job. I'm not sure whether you can tell from the picture or not, but the left side braces were the longer short pieces (if that makes sense) and the right side had the very short pieces. The wall angles there so that the bedroom door can sit at an angle off the hallway. The shelves are wider than the wall, which I did by design because any narrower shelves would have been difficult to get books to stay on ... especially the larger books.

Here's what we came home to. Perfectly painted and cured shelves, ready to be filled.

So that is what I did Monday. I wanted this shelving unit to look nice as well as being functional, so I chose mostly book sets for these shelves. We have millions of books ... well okay, maybe more like a thousand. I'll let you know when I eventually get them all listed in that library registry I wrote about. Don't hold your breath. That is going to take a LONG time to do.

So here's what I put on the shelves, starting at the top. Shelf #1, at the top, is holding a set of
Moody Science DVD's. These are creation science dvd's. There are also a few other dvd's and a set of seminar cd's from this year's
Baby Conference hosted by Vision Forum in San Antonio, TX.
Shelf #2 is tall homeschool books - mostly just extra stuff we don't use all the time. This may change, because I have an entire, enormous bookshelf full of just homeschool books in the garage and it isn't making much sense to me to keep some inside and some out other than the ones we are currently using. And this isn't a good place for the ones we are currently using either as it is too far from where we actually work on school.
Shelf #3 is full of books on Christian Womanhood. These are books my daughter is in the process of reading, and only a very small portion of the books I have in this category. They are sort of the "best of the best" in this category.

Shelf #4 (the top of this picture) holds my growing collection of
Lamplighter books, a full set of
Ralph Moody's Little Britches series, and a set of the
Elsie Dinsmore books.
Shelf #5 contains older hardback books I purchased at a recent library book sale - great old classics by Louisa May Alcott, and other great classics. I love these old books!
Shelf #6 is filled with the Lucy Maude Montgomery's Anne of Green Gables series, a boxed set of Laura Ingalls Wilder books, the
Daughters of the Faith series by Wendy Lawton, and
Patricia St. John's books.Shelf #7 holds several years' collection of Highlights magazines we picked up at a yard sale earlier this summer, and a set of books containing short stories on numerous topics - all very old. The series is called "Through Golden Windows" was published in the 50's. They are full of wonderful graphics and fun stories.
Shelf #8, the bottom shelf, is filled with library books from our public library. It is common for us to check out more than 50 books at a time, so this is a good place to keep them all together.
As you can see, we have some great book sets - and this is a mere fraction of what we have. I have always believed that access to great books - quality books with good moral content - is essential for kids to learn to read and to love to read, as well as for developing good morals. I've linked to several of these books and sets so you can see what they are. I don't think I have paid full price for ANY of these books. I watch sales and have a fund for when I find books on discount. Probably 75% of the books we own are pre-owned, some from yardsales, amazon or half.com. I also really like
libraryanded.com but you have to qualify to purchase from them (homeschools qualify). Overall, yes, we spend a lot of money on books. But to me, it is priceless, and I just figure it as part of the cost of homeschooling. Well worth the investment. Besides, remember, "someday" I'm going to have a whole room dedicated to a home library, and I'm gonna need books to fill it :)
So that's the story of the shelves, and what's on them. Hope you enjoyed and are inspired!
 This evening we went up to the campground at Fremont Lake and picked Oregon grapes. They are tiny berries that grow in clusters on plants that are no taller than 6 inches or so. It takes a lot of stooping and bending. We will be making jelly out of these. They do not taste like regular grapes. They are tart and not good to eat alone. The jelly is a lot like grape jelly though.
 There are lots of places where they grow in thick patches and you can reach 10-15 plants without moving. The good patches have double clusters on each plant and the berries are big and plump ... well, relatively big compared to the scrawny berries :)
 If you look closely there are three plants loaded with berries in this picture growing at the base of some Aspen trees.
 This will give you some idea about how big the berries are - and how juicy and red.
 Not a bad haul for just an hour's work. By the time all my daycare kids went home and we got up to the lake and had dinner with my in-laws, we only had about an hour of daylight to pick them. We're hoping to get some more picked Saturday morning, but this is really quite a lot, so even if we don't we'll have plenty.
 We ended up with about a third of a Walmart bag full of berries.
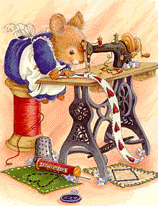
 I again had a chance to do a little stitching while the munchkins rested. It's one of those "sew a couple minutes, check on the kids, sew a couple minutes, etc." situations, so I don't get things done very quickly and my sewing time is limited, but at least I do try to get some in each day if possible. That may change soon as I'm taking on a one year old in September who naps on his own schedule. If his nap times don't line up with everyone else's, my sewing will be very limited.
 I did learn about the importance of pinning though, as you can see from the picture above. I have to confess, I almost never pin anything. It's just so much faster without the pins - both putting them in and taking them out. I don't usually have any problem with not pinning things, but this little bugger slid as I sewed it. I had already done 3/4 of the quilt top without any problem, but once I did this one, they all seemed to want to slide, so I gave in and pinned them.
 I may not like to take time to pin, but I hate taking time to rip out seams. So, I only made that mistake once.
 The middle sideways pin was the one I put in yesterday when I was making my rows. I thought that would hold it well enough, but I would have been faster just to put two pins in them to start with.
 I wanted to see what the finished product would look like, so I laid the rows out on the floor to see. These are sewn in diagonal rows, but the rows are not connected to one another, and I didn't put a lot of effort into making sure they all lined up just right on the floor. Clearly, I still haven't cut out my edge pieces, so like it or not, that will have to be done tomorrow. I love to sew, but don't love to cut, so if there's something to sew, that always wins out.


.jpg)


%2B076.JPG)