 A long time ago, I bought a dressform on ebay. I was more concerned with price than size, so I figured I could pad this one enough to make it my size. (Nobody makes dressforms in my size, so it wasn't going to be possible to get a "real" one.) Well, that's been several years ago, and here the body sits - more of a decoration to my sewing room than useful. (Usually she's stylishly dressed). I've wanted to try draping garments and figured with a dressform I would be able to see what styles look better on me.
 So, I figure if you can make a prom dress and a wallet out of duct tape, why not a presonalized dressform? Actually I stumbled across this idea online and thought it was a great, affordable solution, so I enlisted the help of my wonderful husband. This was really simple - just use trash bags wherever the tape would touch your skin (I didn't want to have to ruin a piece of clothing) and have your husband tape away. There is no way on earth I would have ever done this with anyone else!
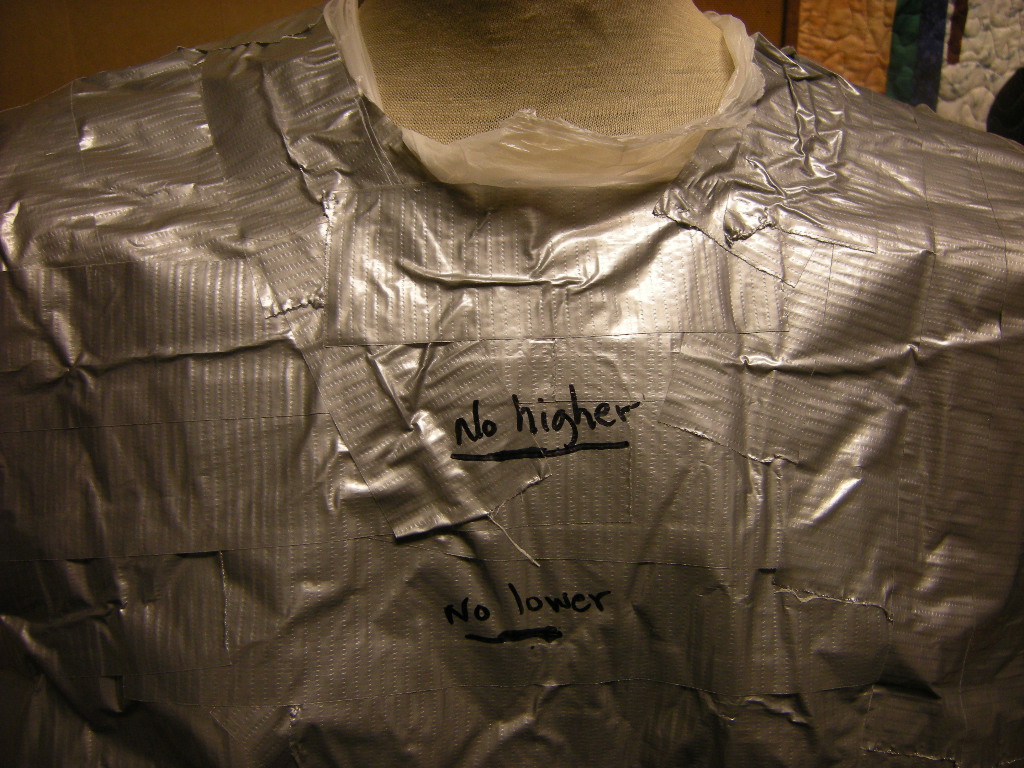 I thought it would be helpful to mark where I preferred my neckline. I'm very particular about not having it too low, so I marked both the comfortable highest and lowest places. I also marked the place where I wanted my shoulder seam. I had my husband bring the tape down on my arms as far as cap sleeves so it was hard to tell where the top of the shoulder should be.
 To get me out of my mummy wrap, my husband cut down the spine on the back of the dress. I put this over my original dress form and then taped down the spine. This was easy to match up, because each row of tape had to line up and worked as a guideline so I didn't end up lop-sided.
 It was easy to tape up the back, but not so much when I was also trying to take a picture - ha.
You can see how the wrinkles and individual pieces of tape work as guidelines.
Once I had the taping done, all that was left to do was to stuff it and tape over the arm and bottom openings. If you do this, don't tape the arms shut until you've stuffed it completely. It's a lot easier to get the stuffing in the top with the arm holes open. This is mostly stuffed with recycled grocery bags.
Sorry, no picture of the finished product. I debated over putting one on here, but decided that would be too much like standing here naked. I will say it came out surprisingly realistic and I think it will work well for what I need.


.jpg)


%2B076.JPG)


No comments:
Post a Comment