 When you run a home daycare, it's a constant battle to provide both family living space and daycare practicality. I'm still struggling with this, and make changes often. This past weekend, we finally did a project that I have been planning and working on for about a year. I think the daycare space won out here, as the family dining table is now crammed into a corner. The original plan would have never combined these two, but since our attempts to separate our daycare from our home has so far been thwarted, this will have to do for now.
 Originally I planned to move our daycare into the other half of our duplex. But that didn't work out because the owner's daughter needed a new place to live. The next plan was for us to move into the home we owned in North Carolina, and are in the process (albeit a very slow process) of having it moved out here to Wyoming. We had planned on being in that house before Christmas, and making the duplex into a full daycare. I've given up on waiting "until" (there's always something to wait on) and now have just decided to go for it. So here is the new bulletin board I've been wanting.
 This is a very simple, very cheap project (if you are close to a Home Depot or Lowes. We got ripped off because our local lumberyard is a joke). It started with a 4'x8' insulation board - not the styrofoam kind, but more of a pressed cardboard type of stuff. It's super cheap - usually less than $10, and makes a perfect bulletin board. I used the same thing for my front entry project last year. This time, I painted it instead of covering it with fabric. I figured fabric would be too distracting for teaching purposes, and poking thumbtacks through fabric isn't the best if you use the bulletin board a lot. I thought I had some trim boards set aside for this project, but when it came time to make it, all we could find were 1x2's, so my wonderful husband cut a groove in the back side of the boards so that there would be a lip of the trim boards to hold the bulletin board in.
 It was fairly easy from there: level the bottom trim board, set the bulletin board inside, and put the rest of the trim up around it.
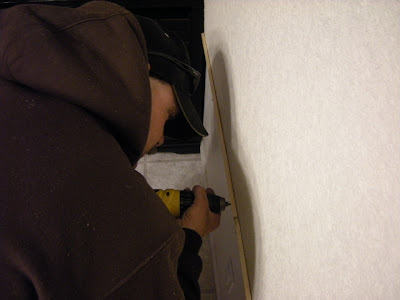
 We hit something solid - either a very solid stud or a nail or something, and one of the screws just squealed and wouldn't go in.
 We had an awful lot of help for this project.
 More help than we probably needed.
 But everyone worked together and had a good time, so we will have good family memories :)
 This is the finished project, with a few items already up. We decided to leave the trim boards their natural color because the changing table is also natural wood. I may eventually decide to paint it white, but for now I like it as it is. With this project, my theory was "done is better than perfect" and I'm relieved that it is finally done. I even told my husband not to bother with mitering the corners. I can't believe it's been in the works for nearly a year ... that's when we bought the supplies and painted the board.
 So here is what the dining room looks like now. It's a little crowded, and this picture doesn't even show the six foot child-height table and little chairs, which goes from the wall under the bulletin board out toward where my 6 year old is sitting. To the left you see our family table, all squished up against the window. We do fit at it, using only 2 1/2 sides ... for now anyway. (The half side is because of the cabinet). It isn't ideal, but it works. The big black cabinet houses all of the homeschool and preschool supplies we need on a daily basis. On the far right of the picture is our diaper changing station. I invested in a daycare quality changing table and overhead storage unit to match, and it has been well worth the money. The changing table used to sit flush against the wall under the overhead unit, but we had to turn it to have room for the kids' table. It works as a partial wall between our living and dining room, and doesn't stick out as bad as I was afraid it would. It's all functional for now, until we do eventually get our house set up and moved into. I'm really hoping to be all moved into it before our baby comes in July.
 I couldn't end this post without sharing the "construction" work my 6 year old did with one of our preschool curriculum supply boxes.
 He decorated every side to look like a real NASCAR race car.
 In case you can't make out the number on the side, this is the 14 car - Tony Stewart.
 And the view from the back. You can't see it in the picture, but it says "NASCAR" on the back. This box has been the highlight of the daycare all week :)


.jpg)


No comments:
Post a Comment